Plumbing Woes? DIY Fixes and Pro Tips to Keep Your Home Flowing Smoothly
Whether you own your place or you’re renting, knowing a thing or two about common plumbing problems and how to deal with them is pretty darn important. Having a plumbing setup that works smoothly not only stops things from getting worse but also keeps your hard-earned cash in your pocket. A well-oiled plumbing system is the unsung hero of our daily routines, but let’s face it – plumbing issues have a knack for showing up out of the blue, causing all sorts of headaches.
For all you homeowners and renters out there, getting the lowdown on the most usual plumbing problems and how to fix them is a game-changer. We’re talking about everything from blocked drains and leaky faucets to toilets that won’t quit running, low water pressure, and hot water system hiccups. We’ll break down what’s causing the trouble, the signs to look out for, and walk you through the steps to sort things out.

You’ll pick up some easy do-it-yourself (DIY) tricks that save you both time and money, plus get the inside scoop on when it’s smart to call in the pros. By staying on top of these everyday plumbing problems, you’re not just preventing a plumbing disaster – you’re keeping your system running like a well-oiled machine and maybe even avoiding those wallet-draining repairs.
So, let’s get savvy and tackle these home maintenance hiccups, starting with the usual suspects of plumbing problems.
Mastering DIY Plumbing: Top 10 Easy Fixes You Can Handle
Save money and become your own plumbing expert with these straightforward DIY fixes. You don’t need advanced skills or tools – just a few basics will empower you to tackle common plumbing issues. Check out this list of the ten most manageable plumbing repairs you can confidently handle:
Kitchen Faucet Drip Fix
Bid farewell to that annoying drippy single-lever kitchen faucet. You can resolve it in about an hour, even if you’re new to plumbing. Fixing a constant drip from your kitchen faucet is a simple DIY task. Turn off the water supply, close the sink drain, and disassemble the faucet. Check for worn-out parts like O-rings or a faulty cartridge. Replace damaged components with the correct replacements for your faucet model. Reassemble, turn the water back on, and enjoy a drip-free kitchen faucet. Save money with this straightforward solution.
Leak-Free Plumbing Joints
Ensuring leak-free plumbing joints is crucial for preventing water damage. The key lies in making proper connections in water supply and waste line fittings. Plumbing professionals use effective techniques to create leakproof joints, preventing potential issues before they occur. By understanding and implementing these tricks, homeowners can contribute to the longevity and efficiency of their plumbing systems. Regular maintenance and proactive measures go a long way in avoiding the inconvenience and expense of leaks in plumbing joints.
Detect and Halt Sneaky Leaks
Explore simple ways to identify and stop common water leaks around bathtubs, showers, drains, sinks, and toilets before they evolve into costly problems. Detecting and halting sneaky leaks is essential for preventing water damage and costly repairs. Simple methods can be employed to identify common water leaks around bathtubs, showers, drains, sinks, and toilets. Regular inspections and prompt intervention can stop these leaks before they lead to more extensive and expensive issues such as rot. Being vigilant and proactive in addressing sneaky leaks ensures the integrity of your plumbing system and protects your home from potential water-related damage.
Unsticking a Cleanout Plug
When dealing with a stuck cleanout plug, using pipe wrenches, applying heat, or resorting to a hacksaw may be necessary. A seasoned pro can navigate these methods to gain access to a stubborn clog in a drain line. By employing the right tools and methods, you can successfully remove the stuck cleanout plug and address drainage issues in your plumbing system.
Running Toilet Resolution
Resolving a running toilet is a manageable task that can be accomplished with a simple four-step strategy. If you’re experiencing constant running, a weak flush, or other common toilet issues, start by identifying the problem. Checking and adjusting the flapper, float, and fill valve are essential steps in the process. By following this straightforward strategy, you can efficiently address and resolve 95 percent of toilet flush problems, ensuring your toilet operates smoothly without unnecessary water waste.
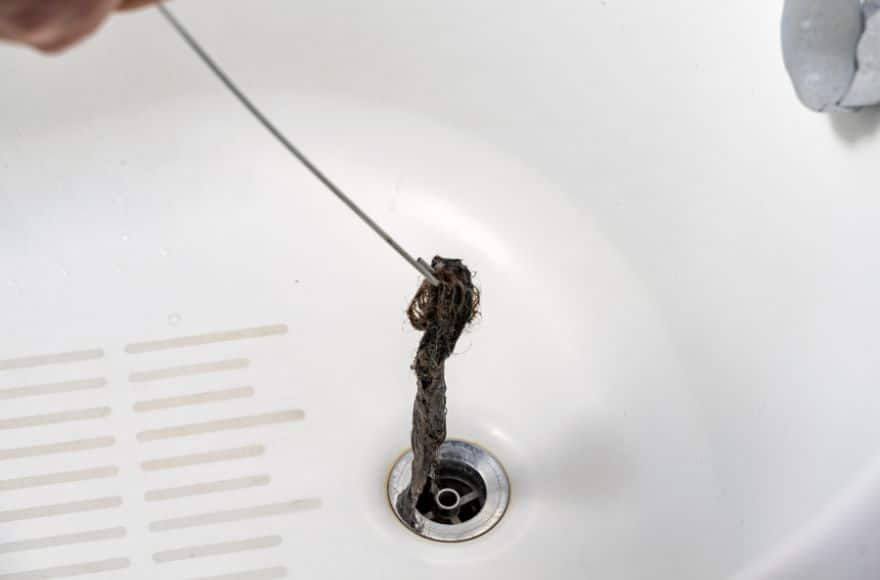
Chemical-Free Bathtub Drain Unclog
Unclogging a bathtub drain without resorting to harsh chemicals is a quick and straightforward process. Begin by removing the stopper and clearing out the accumulated hair and gunk causing the clog. This DIY approach, which doesn’t involve chemical solutions, is effective in resolving around 80 percent of bathtub drain clogs. By following these simple steps, you can restore proper drainage to your bathtub without the need for potentially harmful chemicals.
Efficient Clogged Toilet Fix
Efficiently fixing a clogged toilet involves a few essential tips to make the process smoother. Firstly, consider using a plunger to create a strong seal around the drain and apply firm, rhythmic plunges to dislodge the clog. If the plunger doesn’t work, try using a toilet auger to reach deeper into the drain and break up the obstruction. Additionally, it’s crucial to avoid flushing repeatedly, as this can lead to overflow. Patience is key – allow time for the water level to subside before attempting another flush.
Leaking Water Heater Repair
A leaking water heater can cause significant issues if not addressed promptly. Begin by turning off the power supply to the heater to ensure safety. Identify the source of the leak, commonly occurring at the temperature and pressure relief valve or the drain valve. Check for loose connections, corrosion, or mineral deposits. Tighten any loose fittings, replace a faulty valve, or use a cap to solve drain valve issues.
Water Softener Self-Repair
Begin by checking the brine tank to ensure an adequate salt level for proper softening. Regularly clean the resin bed to prevent impurities from affecting the softening process. Inspect the control valve for any visible leaks or damaged components, tightening connections or replacing parts as needed. check for salt bridges in the brine tank and gently break them up to allow for proper salt dissolution. Verify the water flow to identify and clear any obstructions or clogs in the system.
Shutoff Valve Replacement
Start by turning off the main water supply to your home to ensure a safe working environment. Next, drain any residual water from the plumbing system by opening faucets connected to the valve you’re replacing. Use an adjustable wrench to loosen and remove the nuts on both sides of the old valve, taking care not to damage the surrounding pipes. Once the old valve is removed, install the new one in its place, making sure the seals and connections are secure. Tighten the nuts on both sides, but avoid over-tightening to prevent damage. Turn on the main water supply, check for any leaks, and open and close the valve to ensure proper functionality.
Conclusion
In conclusion, tackling common plumbing issues doesn’t always require professional assistance. With some basic tools, a bit of know-how, and a systematic approach, many problems such as leaky faucets, plumbing joint leaks, clogged drains, and more can be efficiently addressed. By understanding these common plumbing problems and implementing the DIY techniques provided, you not only save money but also maintain a smoothly functioning plumbing system.
Schedule Your Appointment Today
Latest Posts
January 12, 2024
January 12, 2024
January 12, 2024
January 12, 2024
Whenever you need us, we’re here for you.

Owner at AB Handyman Luton
Velizar Stoimenov, the mastermind behind AB Handyman Luton! With a passion for craftsmanship and an eye for detail, he specialize in providing top-notch handyman services that exceed expectations.
Follow
Latest posts by Velizar Stoimenov (see all)
- How do I troubleshoot common appliance issues before calling a handyman for repair? - January 12, 2024
- Plumbing Woes? DIY Fixes and Pro Tips to Keep Your Home Flowing Smoothly - January 12, 2024
- DIY Guide: Fixing a Leaky Roof on Your Own - January 12, 2024